
I completely transformed our bathroom. And I did this without tearing everything down to the studs. Instead, I built a simple, but nice cabinet. And it is the key factor that changed the look and feel of our bathroom. In addition to that cabinet, we added a couple smaller pieces here and there. Et voila, our bathroom not only does look way nicer now, it is also much more organized and overall, a nicer place to be in. I mean, who doesn’t like to do their business in a nice, cosy place.
So, let’s get started with building the cabinet.
The Build Process
I’m using 15 mm birch plywood for all parts of the cabinet, even though, 18 mm would be better. But I had a full 15 mm thick sheet leftover from previous projects, so I used that. First, I cut all the parts to rough dimensions with my track saw.
After that, I used my router to cut the grooves for the middle shelf into the 2 side pieces. I did that, while the 2 sides where still 1 piece. Afterwards I separated and cut them to width on my table saw. This way, I could make sure, that the grooves will be perfectly aligned in the end.
I set the height of the bit to be half the thickness of the board, which sometimes is a bit fiddly with my router. Then I used the track of my track saw as a straight edge. The diameter of the bit I’m using here is smaller than the thickness of the board. So, I had to move the straight edge a little bit over and make a second pass. With the groove finished, I could cut down the board into the two individual sides with my table saw.
The next step was the top and bottom, as well as the middle shelf. As I don’t have a good mitre gauge or crosscut sled, I used my track saw (with a right-angle attachment) to cut these roughly to the right width. Afterwards I could use my table saw with the fence to get the top and bottom to the exact same width.
I wanted to use rabbets for the top and bottom. So, after the boards were cut to the right width, I used the table saw to cut the rabbets. I thought about using the router, but decided against it, as I prefer the table saw to cut rabbets. To cut them, I first made a small groove with the board lying flat on the table saw. Then I bust out the tenon jig to hold the board vertically, set fence and blade height so that the cuts intersect and cut out all 4 rabbets.
I sanded the inside faces and was so eager to glue everything together, that I completely forgot to drill the holes for the adjustable shelf and hinges, which will bite me a bit later.
To hold all 4 sides in place I like to use corner clamps and to add enough pressure, I used 2 band clamps. While the glue was drying, I cut out the middle shelf. And much to my surprise it was a perfect fit right away. This might sound like good thing, but a perfect fit on the first try also means, that I was just a fraction away from cutting the shelf a too small. That’s why I prefer to sneak up on the right fit. But it went well, so I could continue to glue in the shelf and clamp everything together.
Next task was to build the door. And as I wanted to have a window in it, the first step was to cut some grooves in the side pieces. I did that on the table saw and slowly sneaked up on the right fit for the acrylic I wanted to use. I flipped the side pieces for each pass to make sure the groove will end up in the middle. After the grooves were cut, I used my mitre sled to cut all the side pieces to length. I love this sled, as it not only makes cutting perfect 45° corners easy, but also getting all sides to the same length.
As I’ve made a good amount of picture frames in the past, gluing up the door went very smooth, as it’s basically the same thing. I used the band clamps again, as they are perfect for clamping mitred corners. To reinforce the mitred corners, I used some small (size 0) biscuits.
Now to the part where I fix past Philip’s eagerness. To drill the holes for the shelf pins and the door hinges, I used a really simple, but great jig to get the right hole spacing. And my drill with the guide fit barely inside the cabinet. I had to push the bit all the way into the chuck to make it fit. But as a result, the holes weren’t deep enough. So, I had to take a second round, which luckily went relatively quick, as I used a drill stop to get the right depth consistently.
Next up was drilling the holes for the hinges into the door. I needed the middle point between 2 mounting holes. So, I got a Blum jig, which plugs into the existing holes for the adjustable shelf and lets you mark the middle point of these 2 holes. I transferred this middle line over to the door, where I can use these markings for yet another jig. This time for drilling out the mounting holes for the door part of the hinges and luckily there were no further hiccups as the hinges fit perfectly. I screwed the mounting brackets to the cabinet and finally could test out the door.
To keep the cabinet square and prevent stuff from being pushed out the back, I added a back panel made out of 6 mm birch plywood. And my favourite way to get a perfect fit is to cut the back panel a little bit oversized, screw it to the cabinet and then use a flush trim bit in my router to cut off the overhang.
I sanded everything to 240 grid and applied the finish. I used a water-based varnish this time. And with that, the bathroom cabinet is finished.


What else did I do in the Bathroom?
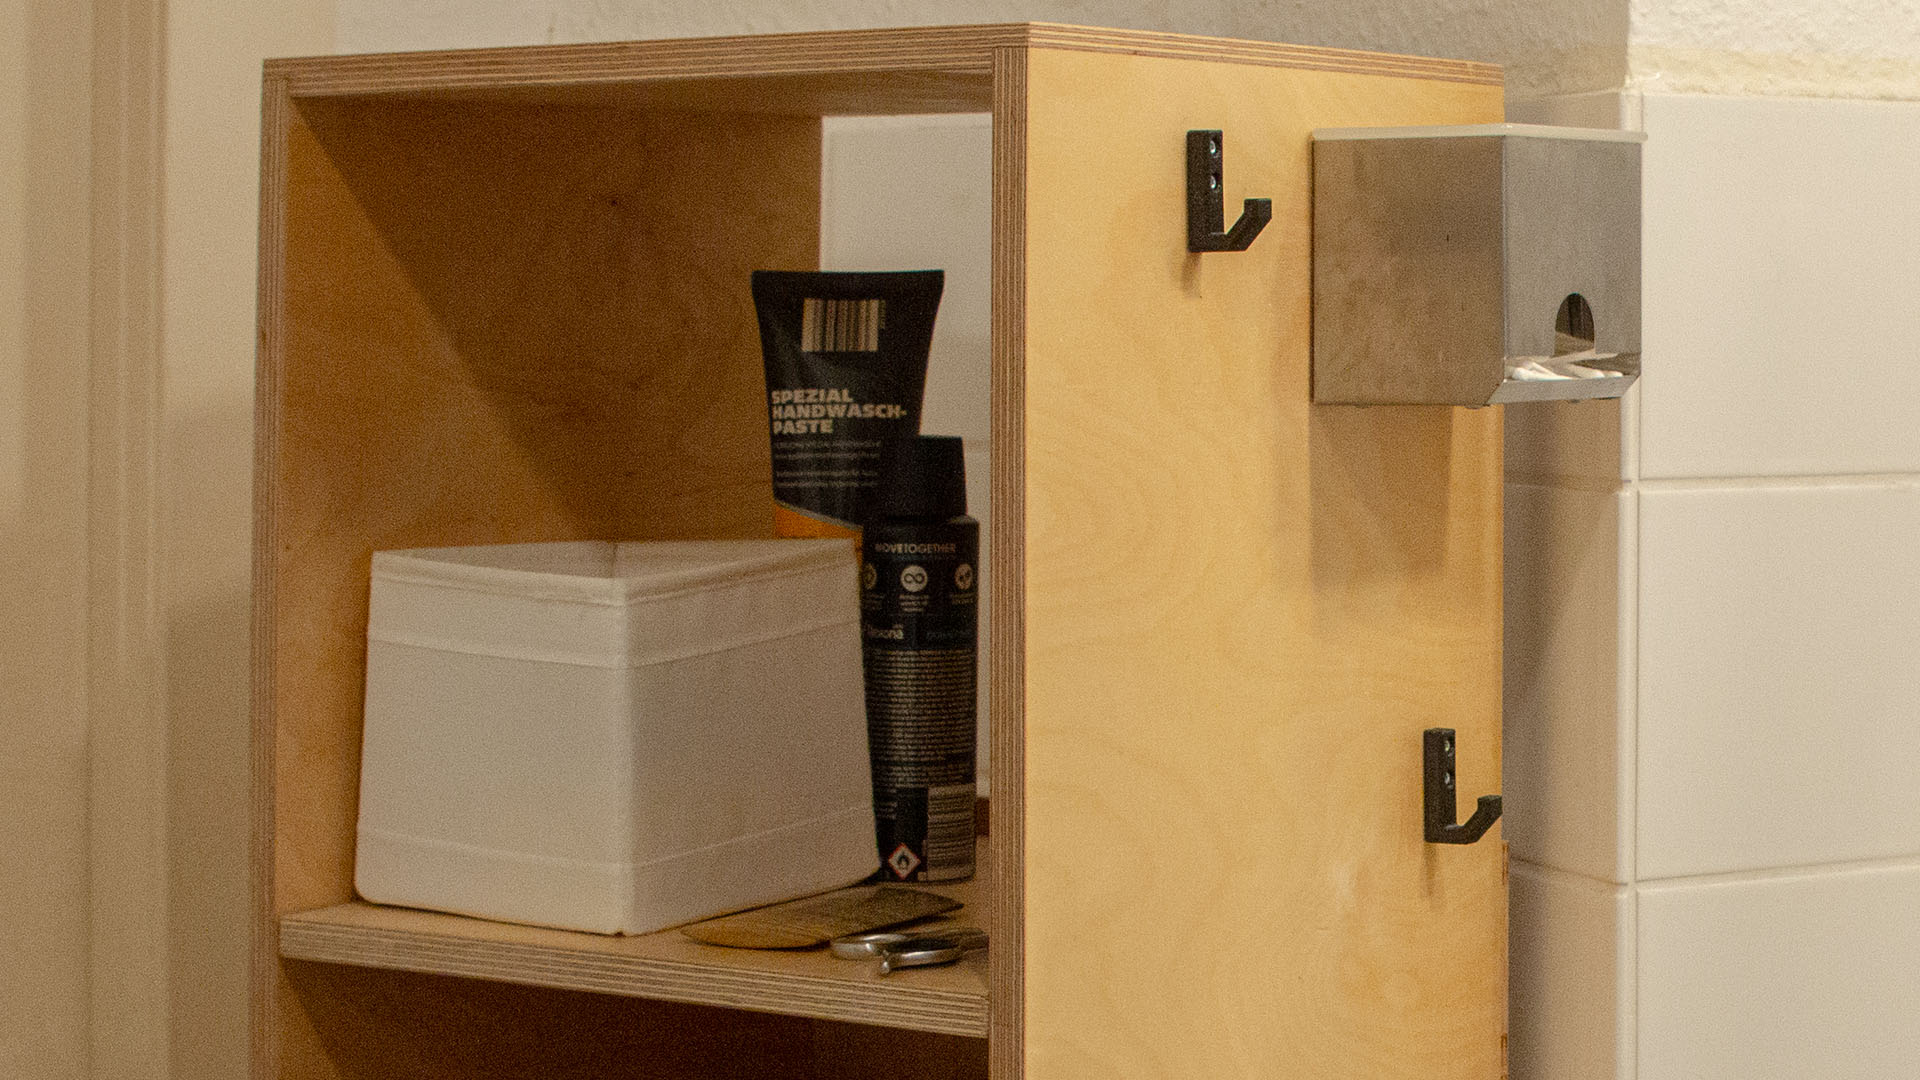
So, the cabinet is finished. We can now turn our attention to some of the smaller projects. And even though they are smaller, they are not less important. I mean, often times it helps to clean up a space and replace ugly or impractical pieces with nice ones that actually work. Like some towel racks, that replaced an ugly screw in the wall. Or a shelf above the sink, that I cut from some scraps and mounted to the wall with some brackets that I painted black. Or some 3D printed hooks I mounted on the side of the cabinet to hang different things, that otherwise didn’t have a place. Or this soap dish, that I 3D printed and not only keeps our soap from falling into the sink, but also looks nice. And something like a plant always gives a room a cozier feeling, so we added one.


Conclusion
Ok. As you saw, you don’t need to tear down your bathroom to make it nicer, cozier and more organized. Especially when you have a smaller bathroom, a good and organized cabinet will go a long way.
So, if you want to build this one, look below, as I have made a build plan for the cabinet, which you can download for free. In addition to that I have the STL files for alle the 3D printed parts, that I used in this bathroom.
And last, but not least, I’ve made a full YouTube Video of the cabinet build. You can check it out below.


